
A character can look convincing in one shot and like a different person after a change of camera angle. The cause may be the reference, the instruction or a discontinuity that becomes noticeable only at the cut. A repeatable checklist helps you locate the problem before rewriting every prompt.
Separate identity from scene state
Identity includes facial structure, the outline of the hairstyle and stable distinguishing features. Scene state includes expression, lighting, position, clothing and held objects. Track these separately.
Consider a courier carrying a shoulder bag. Side lighting may darken the face and a head turn may change its apparent shape; neither should turn the courier into a different person. If the courier puts the bag on a bench, the following shot should continue from that state.
1. Check the canonical character asset
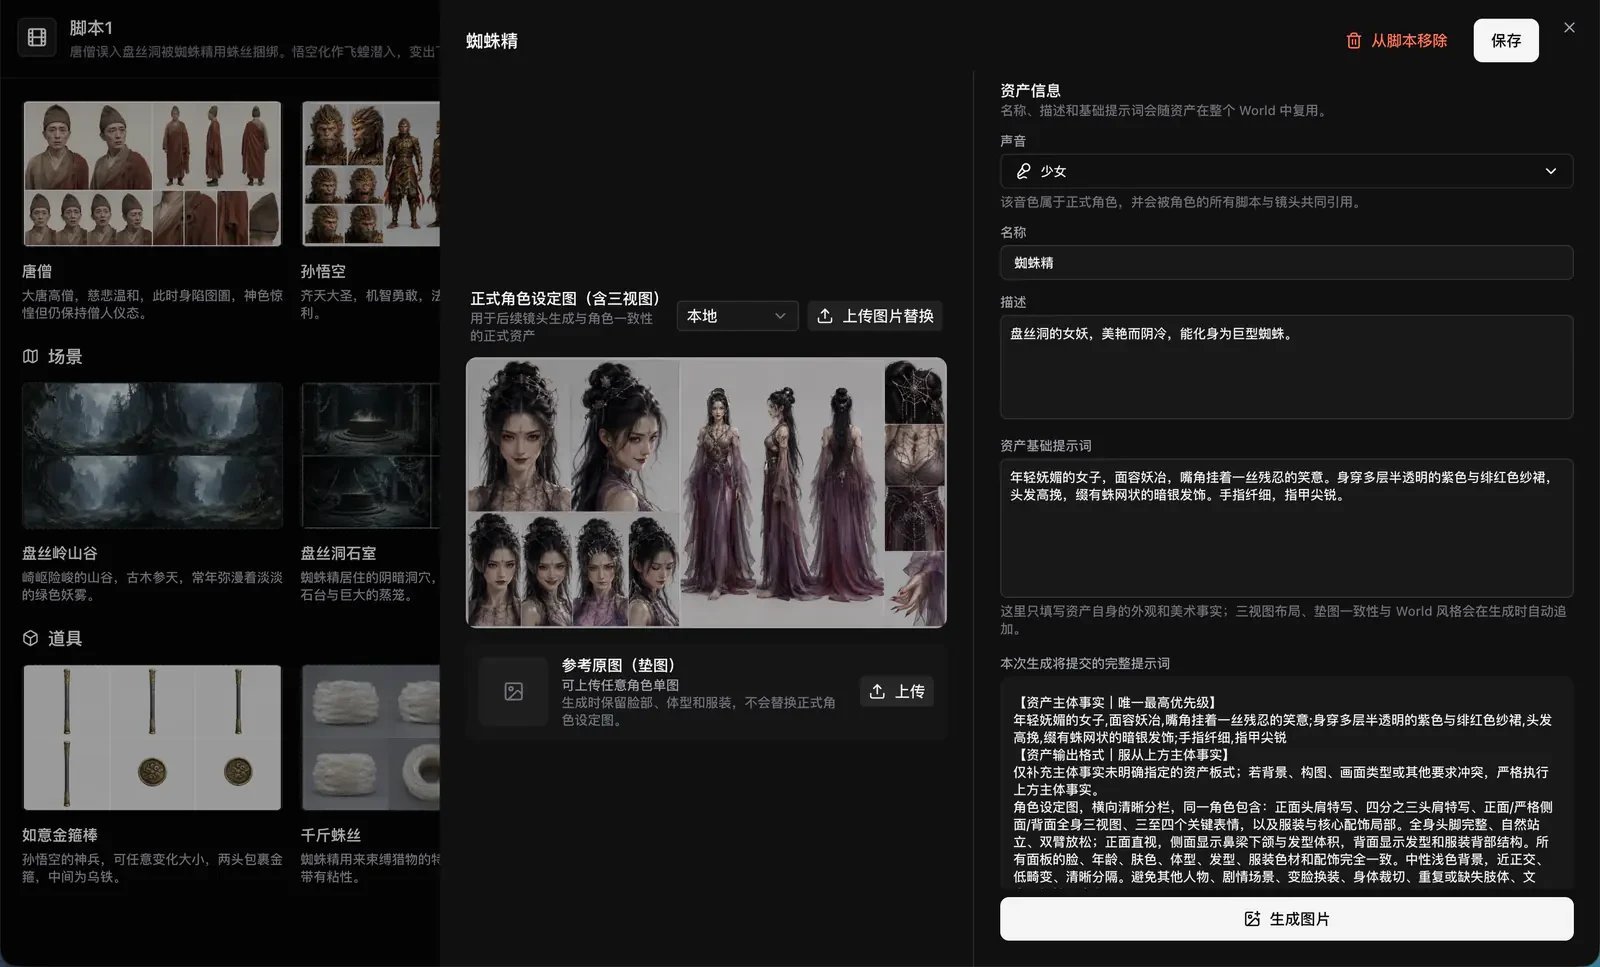
Open the character in the World and inspect the character sheet, name, description and references. The sheet should support the angles you intend to use. A blurred face or contradictory costume details make a poor starting point for a sequence.
If the problem originates in the asset, correct the asset before generating more shots. Repeatedly compensating for the same faulty reference with different descriptions makes the intended identity harder to establish.
2. Select the appropriate version consistently
In ElserStudio, let related shots reference the same relevant character, location and prop assets. Treat a costume change or a different age as an explicit version choice. Avoid silently replacing an appearance that completed shots still depend on.
- Use character references for identity; do not redefine the character through an unrelated style image.
- Reuse the same reference for a recurring prop and identify who is holding it.
- When two people share a frame, name the owner of each action instead of relying on an ambiguous “they turn.”
3. Plan from the actual ending of the accepted take
Watch the previous shot and note the character's position, facing direction, hand action and prop state. Use those observations to write the next opening. A generated take may not have completed the action described in the original plan.
If the suitcase is still closed in the accepted take, show the opening action in the next shot or make the time jump clear through the edit.
For complex staging, clarify positions and camera placement. Framing describes where the action happens and where it is viewed from; the character reference describes who is present.
4. Test three kinds of shot
Start with a close-up, a medium shot with movement and a change of viewpoint. Check each against the same questions:
- Identity: Is the face and silhouette recognizable at the beginning, middle and end?
- Details: Do clothing, hands or props change unexpectedly during motion?
- Continuity: Can the eyeline, movement direction and ending pose connect to the next shot?
- Dialogue: Do the speaker, words, voice and mouth movement correspond?
5. Change one variable and compare
Retry the failed shot while keeping accepted takes. Decide whether the main problem is the reference, action description or camera choice, then change one of those. A longer prompt may introduce new identity conflicts.
Finally, watch the clips together on the timeline. Some differences are natural effects of light and perspective. Prioritize changes that make viewers misidentify the character or misunderstand the action. A World helps organize and reuse references; it cannot guarantee automatic consistency in every frame.
Follow the asset and shot guide, or use the three-shot novel-to-video workflow for your first short sequence.